Friday, November 22, 2024

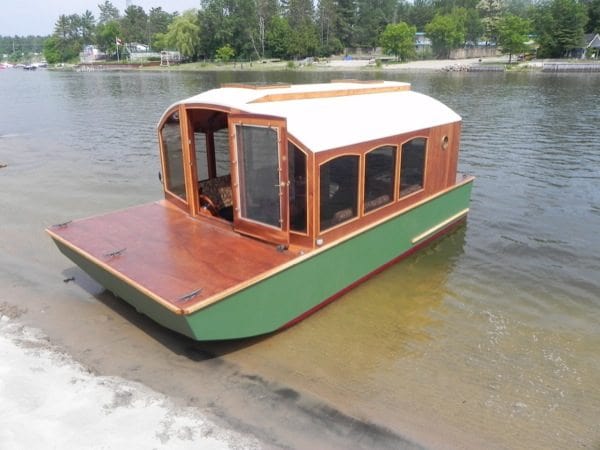
Building a Wooden Houseboat: Plans for Stable and Spacious Homes

Building a Wooden Houseboat: Plans for Stable and Spacious Homes

Ever dreamed of living on the water? Maybe you crave the serene beauty of a sunrise over the lake or the thrill of navigating a river. Building a wooden houseboat might just be the perfect way to make those dreams a reality. But before you jump into the deep end, let's explore the world of wooden houseboat construction and discover what it takes to build a sturdy and spacious home on the water.

Choosing the Right Design for Your Wooden Houseboat

The first step is choosing the right design for your houseboat. There are endless possibilities, from classic, rustic designs to sleek, modern styles. Here are some things to consider:

Size and Layout

The size of your houseboat will depend on your needs and budget. A smaller houseboat might be more affordable and easier to maneuver, while a larger one will offer more living space and perhaps even room for guests.

Style and Features

Do you want a traditional houseboat with a cozy cabin feel, or a more modern design with open living spaces and panoramic views? Consider the features you want, such as decks, balconies, windows, and other amenities.

Floating System

There are various floating systems for houseboats. Some popular options include pontoons, displacement hulls, or a combination of both. Each has its advantages and disadvantages. Research different options and choose the one that best suits your needs and the intended waters.

Understanding Wooden Construction for Houseboats

Wood is a classic and beautiful material for building houseboats. It's strong, durable, and offers a warm, inviting feel. But building a wooden houseboat requires specific knowledge and skills.

Choosing the Right Wood

Not all woods are created equal. Select wood species resistant to rot, moisture, and insects. Popular choices include cedar, redwood, and cypress. Consider the specific needs of your location and the intended use of the wood.

Construction Techniques

Building a wooden houseboat involves various construction techniques. You'll need to consider framing, sheathing, insulation, and finishing. It's crucial to use proper techniques to ensure the structure is strong and watertight.

Marine-Grade Materials

Remember to use marine-grade materials for all parts of your houseboat that will be exposed to water. This includes fasteners, adhesives, and finishes. Marine-grade materials are specifically designed to resist the harsh environment and prevent corrosion.

Ensuring Stability and Safety

Building a wooden houseboat requires careful attention to stability and safety. Here are some key considerations:

Weight Distribution

Proper weight distribution is crucial for stability. Ensure the weight is evenly distributed across the pontoons or hull to avoid instability and potential capsizing.

Buoyancy Calculations

It's essential to calculate the buoyancy of your houseboat to ensure it displaces enough water to float safely. A professional engineer can assist you with these calculations.

Safety Features

Incorporate safety features like railings, life jackets, and fire extinguishers to ensure a safe experience on the water. Consider installing a bilge pump to remove any water that might seep in.

The Power of Collaboration: Finding the Right Team

Building a houseboat is a significant undertaking. It's a good idea to work with a team of experienced professionals, including:

  • An Architect or Designer: To create the perfect design for your houseboat, incorporating your vision and needs.
  • A Marine Engineer: To ensure the houseboat is built to meet the highest standards of stability and safety.
  • A Contractor: To handle the construction process efficiently and professionally.
  • A Skilled Carpenter: To bring your houseboat's design to life with meticulous craftsmanship.

Embracing the Journey: Building Your Wooden Houseboat

Building a wooden houseboat is a journey filled with challenges and rewards. It's a chance to be hands-on, learn new skills, and create a unique home on the water. Embrace the process, ask for help when needed, and celebrate each milestone along the way.

Living the Dream: Life on a Wooden Houseboat

Imagine waking up to the gentle rocking of the water, enjoying breathtaking views, and having the freedom to explore new waters. Living on a wooden houseboat can be a truly unique and rewarding experience. You'll have the chance to connect with nature, enjoy a peaceful lifestyle, and make memories that will last a lifetime.

Commonly Asked Questions

How much does it cost to build a wooden houseboat?

The cost of building a wooden houseboat can vary widely depending on the size, design, and features. Expect to invest a significant amount of money, but remember, it's an investment in a unique and fulfilling lifestyle.

How long does it take to build a wooden houseboat?

The construction time depends on the size and complexity of the houseboat. It can take several months or even a year or more to complete. Be patient and enjoy the process of building your dream home.

What are the maintenance requirements for a wooden houseboat?

Wooden houseboats require regular maintenance to keep them in top condition. This includes inspecting the wood for signs of rot or damage, applying sealant, and cleaning the hull and other surfaces. You'll also need to monitor the pontoons or hull for leaks or wear and tear.

Do I need any special permits or licenses to build or operate a wooden houseboat?

Yes, you'll need to obtain the necessary permits and licenses from your local authorities. The specific requirements vary depending on your location and the size and design of your houseboat. It's best to consult with your local authorities to understand the regulations and requirements.

Where can I find resources to learn more about building a wooden houseboat?

There are many resources available to help you learn more about building a wooden houseboat. You can find books, articles, websites, and online forums dedicated to houseboat construction. You can also consider attending workshops or classes to gain practical skills and knowledge.

Building a wooden houseboat is a journey that will test your skills, challenge your creativity, and ultimately, bring you closer to your dream of living on the water. It's a commitment to a unique lifestyle filled with adventure, tranquility, and the beauty of nature.
Read More..
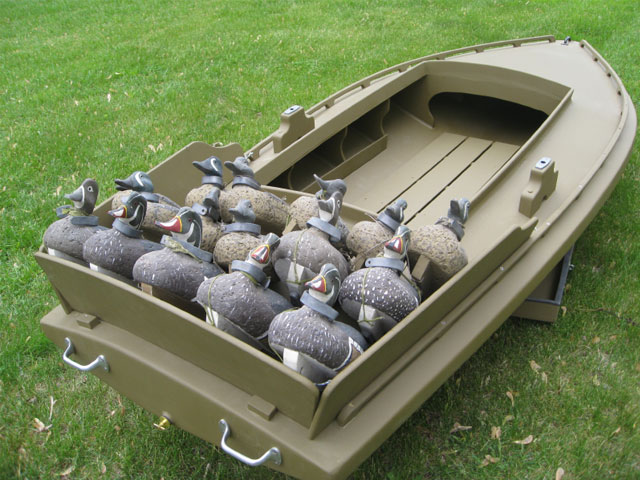
Build a Camouflaged Duck Boat: Wooden Plans for DIY Hunters

Build Your Own Camouflaged Duck Boat: Wooden Plans for DIY Hunters

There's nothing quite like the thrill of a successful duck hunt, especially when you've built your own boat. This article will walk you through the process of constructing a durable and effective duck boat using wood. Whether you're a seasoned hunter or a novice, these detailed plans will guide you towards creating a vessel that will blend seamlessly into the environment and bring you closer to your quarry.

Choosing the Right Wood

The heart of your duck boat lies in the wood you choose. Marine-grade plywood is your best bet, as it's resistant to moisture and decay, making it perfect for the harsh conditions of a hunting environment. Consider using plywood with a thickness of at least 1/2 inch for optimal strength and stability.

Types of Wood

For the hull, marine-grade plywood is the go-to choice. Consider using a layer of marine-grade plywood for the outer hull and another layer of plywood for the inner hull for added durability. You can choose between various types of marine-grade plywood, such as fir, oak, or cedar, depending on your budget and preference. When purchasing plywood, ensure it's stamped with the Marine Plywood Association (MPA) certification mark.

For structural elements like the gunwales, ribs, and seats, you can opt for solid hardwoods like oak, cedar, or mahogany. These woods provide strength and a natural resistance to moisture, enhancing the longevity of your duck boat.

Building the Hull

Before you begin building, it's crucial to have a detailed plan. You can either find readily available plans online or create your own. Ensure your plan outlines the boat's dimensions, the shape of the hull, and the placement of all structural components. This will serve as your guide throughout the building process.

Cutting and Shaping

Use a circular saw or a table saw to cut the plywood sheets according to the dimensions outlined in your plans. For intricate curves, utilize a jigsaw or a band saw. Sand the edges of the cut pieces to ensure a smooth and even surface.

Assembling the Hull

Start by assembling the bottom of the hull. Secure the plywood sheets together using marine-grade epoxy and screws. For added reinforcement, consider using fiberglass cloth and epoxy along the seams. Once the bottom is complete, attach the sides of the hull to the bottom. Remember to leave an opening for the deck and for access to the interior.

Adding Structural Components

The strength and stability of your duck boat hinge on the structural components like gunwales, ribs, and seats. These elements help maintain the boat's shape and distribute the weight evenly.

Gunwales

Gunwales run along the upper edges of the hull, providing a secure perimeter for the boat and supporting the deck. Cut and shape your chosen hardwood to the desired length and width. Use screws and epoxy to attach them to the sides of the hull.

Ribs

Ribs are strategically placed along the length of the boat, providing internal support and maintaining the shape of the hull. They're typically made from wooden planks that are curved and attached to the gunwales and the hull. You can use screws and epoxy to secure the ribs in place.

Seats

Comfortable and sturdy seats are essential for a successful duck hunt. You can build simple benches or create more elaborate seats with backrests using your chosen hardwood. Securely attach the seats to the boat's interior using screws and epoxy.

Camouflaging Your Duck Boat

The final step is to camouflage your duck boat, making it virtually invisible to wary ducks. This involves covering the boat's exterior with a suitable material that blends into the surroundings.

Choosing Camouflage Material

You have a wide range of options when it comes to camouflage material. Consider using natural materials like reeds, cattails, and branches. Alternatively, you can opt for commercially available camouflage netting or paint that mimics the colors and patterns of the environment where you'll be hunting.

Applying Camouflage

To ensure a seamless camouflage effect, secure the chosen material to the boat's exterior using zip ties, screws, or staples. Ensure the material is distributed evenly, covering the entire surface. You can also use spray adhesive for a more permanent and robust camouflage.

Safety Considerations

Safety should always be paramount when hunting. Ensure your duck boat is equipped with essential safety gear, including:

  • Life jackets
  • An anchor
  • A whistle
  • A first aid kit
  • A flashlight
  • A fire extinguisher

Always inspect your duck boat before each hunt to ensure all components are secure and in good condition.

Final Touches

After completing the build, you can add personal touches to your duck boat. Consider installing a small storage compartment for gear, adding a built-in cooler, or creating a custom-designed gun rack. The possibilities are endless, allowing you to personalize your duck boat to your specific needs.

Building your own camouflaged duck boat can be a rewarding experience, allowing you to create a hunting vessel that's tailored to your specific needs. This DIY project will not only save you money but also give you a sense of pride and accomplishment. Remember to prioritize safety, and with careful planning and execution, you'll have a duck boat that will serve you well for years to come.

Read More..
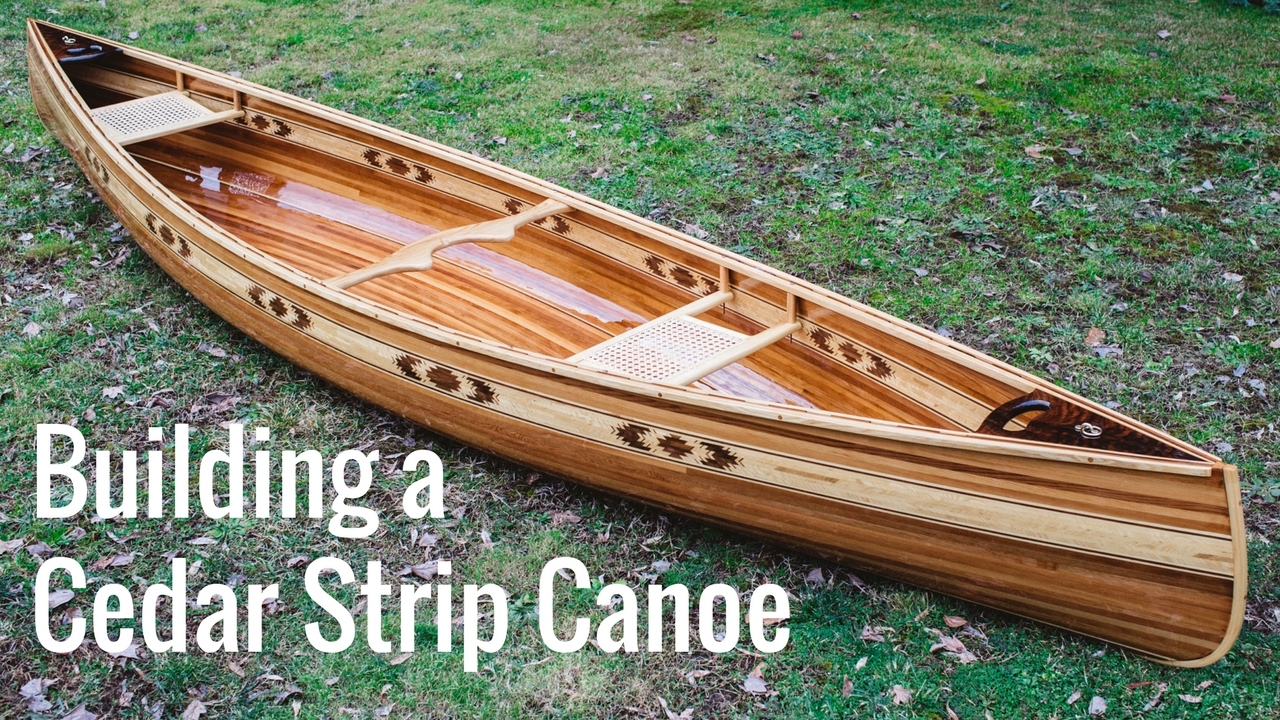
Building a Wooden Canoe: Full Instructions for Every Step

Building a Wooden Canoe: A Journey of Skill and Tradition

The rhythmic tap of a mallet, the scent of fresh wood, the graceful arc of a canoe hull â€" building a wooden canoe is an experience that combines craftsmanship, patience, and the thrill of creation. It's not just about constructing a vessel; it's about connecting with a rich tradition, embracing the beauty of natural materials, and forging a bond with something truly unique.

This guide is your companion on this journey, providing you with a comprehensive overview of each step, from selecting the right wood to finishing touches. Don't worry if you're a beginner; this isn't a race, it's a process of learning, enjoying, and creating something truly special.

Step 1: Gathering Your Materials

Before you dive into the build, you need to gather the right tools and materials. Think of it as assembling your team of collaborators â€" each element will play a crucial role in shaping your canoe.

Choosing the Wood

The heart of your canoe is the wood. Traditional choices like cedar, spruce, and oak offer strength, durability, and a beautiful natural grain. Cedar is known for its light weight and resistance to rot, making it a popular choice for canoe building. Spruce is another great option, known for its strength and flexibility. Oak is a more robust choice, ideal for canoe frames and ribs.

Essential Tools

A well-equipped workshop is your haven. Here are some essential tools you'll need:

  • Hand Planes: For smoothing and shaping the wood.
  • Chisels: For carving and shaping.
  • Saw: For cutting wood to the required dimensions.
  • Mallet: For striking chisels and shaping wood.
  • Measuring Tape: For precise measurements.
  • Clamps: For securing wood during construction.
  • Sandpaper: For smoothing the finished canoe.

Step 2: Setting Up Your Workspace

A well-organized workspace is crucial for efficient and enjoyable canoe building. You'll want a space large enough to comfortably accommodate your canoe and tools. A sturdy workbench is essential for precise work, and good lighting is key for clarity.

Building the Frame

The frame is the backbone of your canoe, providing strength and support. You'll start by constructing the stem and keel, the foundational pieces. Then, you'll build the ribs, the curved pieces that give your canoe its shape.

  • Cutting and Shaping: Using your saw and chisels, cut and shape the stem, keel, and ribs according to your chosen plans. Pay close attention to angles and curves.
  • Stem and Keel Assembly: Join the stem and keel using strong wood glue and secure them with clamps.
  • Rib Assembly: Attach the ribs to the stem and keel, making sure they are evenly spaced and securely fastened.

Step 3: Planking the Hull

Now comes the part where you start to see your canoe take shape. You'll be using planks of wood, carefully fitted together, to create the smooth and watertight hull.

Plank Selection

Choose planks of the appropriate thickness and width for your canoe. Ensure they are straight and free from knots.

Plank Fitting and Shaping

Carefully fit the planks to the frame, using hand planes to shape them to the curve of the ribs.

Plank Joining

Join the planks using a combination of wood glue, screws, and traditional methods like lap joints or scarf joints.

Step 4: Finishing Touches

Your canoe is starting to look like a canoe! Now it's time to put the finishing touches on your masterpiece.

Sanding and Refinishing

Smooth out any rough edges and imperfections with sandpaper. Depending on your preference, you can apply a protective finish like varnish or polyurethane to enhance the beauty of the wood and provide extra protection.

Adding Hardware

Attach the necessary hardware like seats, thwart, and yoke. Use high-quality materials designed for marine use.

Final Inspection

Before taking your canoe out on the water, give it a thorough inspection. Make sure all joints are secure, and there are no leaks or gaps.

Step 5: Launching and Enjoying

The moment has arrived! Launch your canoe into the water and experience the joy of your creation. Take a paddle down a peaceful river, enjoy the stillness of a lake, or explore the coastline. Your wooden canoe is a testament to your skill and dedication, ready to carry you on countless adventures.

Commonly Asked Questions

Q: Do I need any prior woodworking experience to build a canoe?

A: While some basic woodworking knowledge is helpful, you don't need to be an expert. Building a canoe is a great opportunity to learn new skills. There are numerous resources and online communities that can provide guidance and support along the way.

Q: How long does it take to build a canoe?

A: The time it takes varies depending on factors like the complexity of the design, your experience level, and the time you dedicate to the project. It can range from a few weeks to several months.

Q: How much does it cost to build a canoe?

A: The cost depends on the materials you choose, the complexity of the design, and your level of DIY. You can save money by using recycled wood or seeking discounts on supplies. However, remember that investing in quality materials and tools will pay off in the long run.

Q: Can I build a canoe from scratch, or should I use pre-made kits?

A: Both options have advantages and disadvantages. Building from scratch offers greater freedom and control over the design. Pre-made kits provide a solid foundation and detailed instructions, making the process more accessible to beginners.

Q: Is there a specific style of canoe I should build?

A: Choose a style that suits your intended use. For solo paddling, a lightweight and maneuverable canoe is ideal. For carrying passengers or gear, a more robust and stable canoe is recommended.

Read More..

Wednesday, November 20, 2024

Wooden Kayak Plans for Eco-Friendly Builds

Wooden Kayak Plans for Eco-Friendly Builds

Wooden Kayak Plans: Embark on an Eco-Friendly Adventure

There's something truly special about paddling a wooden kayak. The smooth, natural feel of the wood beneath your hands, the gentle sway of the craft as you glide through the water, and the satisfaction of having built it yourself â€" it's an experience that connects you with nature in a way that few other activities can. But beyond the aesthetics and the thrill of creation, building a wooden kayak offers a chance to embrace sustainable practices and minimize your impact on the environment.

In an era where disposable plastic kayaks are prevalent, choosing to build your own wooden kayak is a statement. It's a commitment to using durable, renewable resources, supporting local timber suppliers, and leaving a lighter footprint on our planet.

Let's dive into the exciting world of wooden kayak plans and explore why you might want to embark on this rewarding journey.

Why Choose Wooden Kayak Plans?

You might be wondering, "Why go through the effort of building a wooden kayak when I can simply buy one?" It's a valid question, and the answer is multifaceted. Here's a glimpse into the benefits of choosing wooden kayak plans:

Sustainability

Wooden kayaks are a testament to sustainable practices. Wood is a renewable resource, and when sourced responsibly, it helps preserve forests and promote biodiversity. Compared to plastic kayaks that can take hundreds of years to decompose, wooden kayaks are biodegradable and ultimately return to the earth.

Durability

Don't let the natural material fool you! Wooden kayaks are remarkably strong and durable. When built with proper techniques and using quality wood, they can last for generations, offering a lifetime of paddling adventures. They are resistant to scratches and dents, making them suitable for navigating through challenging waters.

Uniqueness

Each wooden kayak is a work of art, reflecting the unique grain patterns and textures of the wood. You can customize your design to your heart's content, incorporating your own touches and preferences. This personalized approach allows you to create a kayak that's truly your own â€" a vessel that speaks to your individuality.

Skill Building

Building a wooden kayak is an enriching experience that involves learning new skills. You'll gain hands-on experience with woodworking techniques, measuring and cutting wood, using tools safely, and applying different finishes. These are skills that can be applied to various DIY projects and add value to your life.

Connection to Nature

There's a special connection you forge with nature when you build and paddle a wooden kayak. You feel a sense of unity with the materials you use, the landscapes you navigate, and the natural world that surrounds you. It's an experience that deeply resonates with those who seek a deeper connection with nature.

Finding the Right Wooden Kayak Plans

The internet is a treasure trove of wooden kayak plans. You'll find a wide range of options catering to different skill levels, sizes, and aesthetics. Here's a breakdown of what to consider when choosing the perfect plans:

Skill Level

Be realistic about your woodworking skills. There are beginner-friendly plans that are perfect for starting out, while others cater to experienced woodworkers. Look for plans that offer detailed instructions, clear diagrams, and helpful tips to ensure a smooth building process.

Kayak Size

Consider your height, weight, and paddling style. Choose a plan that offers a comfortable fit and sufficient carrying capacity for your needs. There are plans for solo kayaks, tandems, and even kayaks designed specifically for fishing or touring.

Design

Think about the aesthetic you're drawn to. There are classic designs like the Greenland kayak, the Aleutian kayak, and the traditional cedar strip kayak. Or you might be drawn to more modern designs with sleek lines and innovative features.

Cost

Materials can vary in cost, so consider your budget. Some plans may require specific types of wood or hardware that can add to the overall expense.

Building Your Wooden Kayak: A Step-by-Step Journey

Building a wooden kayak is a journey of discovery, and each step brings you closer to your dream vessel. Here's a general overview of the process:

Step 1: Gather Materials

Start by collecting all the necessary materials, including wood, epoxy resin, fiberglass cloth, screws, fasteners, and any other tools or equipment specified in your plans.

Step 2: Prepare the Wood

Carefully cut, shape, and join the wood according to the plans. Use a router to create precise cuts, a sander to smooth the surfaces, and a clamping system to hold the pieces in place.

Step 3: Build the Hull

Assemble the hull using techniques like stitch-and-glue or strip planking. These methods involve joining the wood pieces together with adhesive and reinforcement.

Stitch-and-Glue Method

This method involves stitching the wood strips together using wire or thread, then applying epoxy resin to glue the pieces permanently.

Strip Planking Method

This method uses thin strips of wood that are meticulously planked onto a mold to create the hull shape.

Step 4: Apply Epoxy Resin

Epoxy resin is used to seal and protect the wood. It creates a waterproof barrier and strengthens the kayak's structure. Follow the manufacturer's instructions carefully for proper application.

Step 5: Add Fiberglass Cloth

Fiberglass cloth is used to reinforce the hull, providing additional strength and durability. Apply epoxy resin to the fiberglass cloth and lay it over the hull.

Step 6: Finishing Touches

Once the epoxy resin has cured, you can sand the kayak smooth, apply a sealant, and paint or varnish it to your liking.

Essential Tools for Wooden Kayak Building

Building a wooden kayak requires a range of tools. Here are some essentials to get you started:

  • Table Saw
  • Circular Saw
  • Router
  • Sander
  • Clamps
  • Epoxy Resin and Hardener
  • Fiberglass Cloth
  • Paintbrush and Roller
  • Measuring Tape
  • Safety Glasses and Gloves
  • Tips for Success

    Building a wooden kayak is a rewarding experience, but it's essential to be patient and meticulous. Here are a few tips to ensure a successful build:

  • Read the plans carefully before starting.
  • Use high-quality materials and tools.
  • Work in a well-ventilated area.
  • Take your time and don't rush the process.
  • Ask for help if needed.
  • Commonly Asked Questions

    Q: How long does it take to build a wooden kayak?

    The time it takes to build a wooden kayak varies depending on the design complexity, your experience level, and the amount of time you dedicate to the project. It can range from a few weeks to several months.

    Q: How much does it cost to build a wooden kayak?

    The cost of building a wooden kayak can vary depending on the materials used, the size of the kayak, and the complexity of the design. It's generally more economical than buying a ready-made kayak, especially if you already have some of the tools.

    Q: Do I need woodworking experience to build a wooden kayak?

    While having woodworking experience is helpful, it's not essential. There are plans specifically designed for beginners that provide comprehensive instructions and guidance. Starting with a simple design and gradually progressing to more complex ones can be a rewarding way to learn.

    Q: What kind of wood is best for building a kayak?

    The best wood for building a kayak depends on the specific design and your preferences. Common choices include cedar, mahogany, spruce, and redwood. Research different types of wood to determine their properties, durability, and availability.

    Q: How do I maintain a wooden kayak?

    Maintaining a wooden kayak involves regular cleaning, inspection, and occasional repair. Wash the kayak with mild soap and water after each use. Check for any cracks or damage and address them promptly. Apply sealant to the hull periodically to protect it from the elements.

    Building a wooden kayak is a fulfilling journey that combines craftsmanship, sustainability, and a deep connection with nature. As you navigate the waters in your handcrafted vessel, you'll not only enjoy the thrill of paddling but also savor the satisfaction of having built something beautiful and enduring.

    Read More..

    Friday, November 15, 2024

    How to Build a Wooden Skiff: Complete Guide

    How to Build a Wooden Skiff: Complete Guide

    Building a Wooden Skiff: A Comprehensive Guide

    Constructing a wooden skiff is a rewarding endeavor that combines traditional craftsmanship with modern techniques. This comprehensive guide will walk you through the process, from design considerations to finishing touches, empowering you to build your own elegant and functional watercraft.

    Step 1: Design and Planning

    Before diving into construction, meticulous planning is paramount. This involves defining your skiff's purpose, dimensions, and desired features.

    Purpose and Usage:

    Consider how you intend to use the skiff: recreational paddling, fishing, or even a small sailboat. This will influence the boat's length, beam, and stability.

    Skiff Design:

    Numerous skiff designs are available, each offering unique characteristics. Consider factors such as:

    • Length: Shorter skiffs are maneuverable but less stable, while longer skiffs offer more stability and carrying capacity.
    • Beam: A wider beam provides greater stability, but it can increase drag.
    • Depth: A deeper hull will be more stable in choppy water, but shallower hulls are better for navigating shallow waters.
    • Chine: The angle of the chine (the transition point between the hull and the side) influences stability and handling.

    Materials and Construction Methods:

    Selecting the right materials and construction methods is crucial for a durable and watertight skiff. Common options include:

    • Wood Species: Cedar, mahogany, or oak are popular choices for their strength, durability, and water resistance.
    • Construction Methods: Options include stitch-and-glue, plank-on-frame, and strip planking, each offering distinct advantages and complexities.
    • Epoxy Resin and Fiberglass Cloth: Epoxy resin provides a strong and waterproof bond for wood, while fiberglass cloth enhances the hull's strength and durability.

    Step 2: Gathering Materials and Tools

    Once your design is finalized, gather the necessary materials and tools. Ensure you have a comprehensive list to avoid delays and ensure a smooth construction process.

    Materials:

    • Wood: Select high-quality lumber, ensuring it's properly seasoned and free from defects.
    • Epoxy Resin and Hardener: Choose marine-grade epoxy for optimal water resistance.
    • Fiberglass Cloth: Use various weights depending on the hull's required strength.
    • Fasteners: Stainless steel screws, bolts, and rivets are ideal for marine applications.
    • Wood Filler: Use marine-grade filler to smooth out any imperfections.
    • Paint or Varnish: Select a suitable marine-grade finish to protect the wood.

    Tools:

    • Power Tools: Circular saw, jigsaw, drill, router, belt sander, orbital sander.
    • Hand Tools: Chisels, planes, hammers, screwdrivers, clamps.
    • Measuring Tools: Tape measure, ruler, protractor, square.
    • Safety Gear: Safety glasses, dust mask, gloves, ear protection.

    Step 3: Building the Hull

    The hull construction process is where your design comes to life. Follow these steps carefully:

    Constructing the Frames:

    • Frame Layout: Cut and assemble the frames according to your design plans.
    • Frame Alignment: Ensure the frames are precisely aligned and securely fastened.

    Planking the Hull:

    • Plank Preparation: Cut and shape the planks to fit the hull curvature.
    • Plank Installation: Attach the planks to the frames using a chosen method (e.g., stitch-and-glue, plank-on-frame).
    • Fairing: Use wood filler and sanding to smooth out any unevenness or imperfections in the hull.

    Epoxy and Fiberglass Reinforcement:

    • Epoxy Application: Apply epoxy resin to the hull's interior and exterior to create a strong and waterproof barrier.
    • Fiberglass Cloth Layering: Apply layers of fiberglass cloth to reinforce the hull, ensuring proper overlapping and resin saturation.

    Step 4: Building the Deck and Interior

    After the hull is complete, build the deck and add the interior components.

    Deck Construction:

    • Deck Framing: Construct a strong frame to support the deck.
    • Deck Planking: Attach the deck planks to the frame, ensuring proper drainage and watertightness.
    • Deck Features: Add any desired features such as seats, storage compartments, and cleats.

    Interior Features:

    • Seats and Storage: Install seats and storage compartments to meet your specific needs.
    • Navigation Lights: Install navigation lights for visibility in low-light conditions.

    Step 5: Finishing Touches

    The final step involves finishing the skiff to protect the wood and enhance its appearance.

    Sanding and Finishing:

    • Sanding: Smooth out any rough areas and prepare the surface for painting or varnishing.
    • Painting or Varnishing: Apply multiple coats of marine-grade paint or varnish to protect the wood from water and UV damage.

    Hardware and Accessories:

    • Oars or Paddle: Select oars or a paddle suitable for your skiff's size and intended use.
    • Rowlocks: Install rowlocks to secure the oars.
    • Safety Equipment: Equip your skiff with essential safety gear such as life jackets, a whistle, and a first aid kit.

    Step 6: Launching and Enjoyment

    After meticulous construction and finishing, it's time to launch your wooden skiff and enjoy the fruits of your labor. Always prioritize safety and be aware of local regulations.

    Launching and Testing:

    Choose a calm body of water for the initial launch and test the skiff's stability and handling.

    Maintenance and Care:

    Regular maintenance is crucial for extending your skiff's life. Inspect for damage, clean the hull, and apply touch-up paint or varnish as needed.

    Building a wooden skiff is a challenging but rewarding project. With careful planning, attention to detail, and dedication to craftsmanship, you can create a beautiful and functional boat that will provide countless hours of enjoyment on the water.

    Read More..

    Thursday, November 14, 2024

    How to Build a Wooden Duck Boat for Hunting

    How to Build a Wooden Duck Boat for Hunting

    Building a Wooden Duck Boat for Hunting

    Alright, folks, let's talk about building a wooden duck boat. Now, this ain't your average craft project. This is serious business, we're talking about a boat that's gonna take you out into the wild and help you bag some ducks. This project takes time, skill, and dedication, but the satisfaction of knowing you built it yourself, and the thrill of hunting from your own creation, is worth every minute of it. Let's dive in!

    Materials You'll Need

    First things first, let's gather the materials. You'll need a good mix of wood, hardware, and some specialized tools. Here's what you'll need:

    Wood

    • Marine Plywood: This is your base, the backbone of your boat. Choose a high-quality marine plywood, preferably 1/2" or 3/4" thick. Make sure it's waterproof, resistant to rot and moisture, and suitable for the harsh conditions of a duck boat.
    • Cedar or Fir: These are excellent choices for the boat's frame. Cedar is naturally resistant to rot and insects, making it a great choice for a duck boat that will be exposed to water. Fir is a bit more affordable and still offers good strength.
    • Oak: This is a tough wood, perfect for the gunwales, the top edges of the boat, providing durability and support.

    Hardware

    • Fasteners: You'll need a variety of screws, bolts, and nails, all made of marine-grade stainless steel to resist corrosion. Don't skimp on this part, rust is your enemy in a boat!
    • Epoxy Resin: This is the magic glue that will bind your wood together and waterproof your boat. Choose a quality epoxy resin, and make sure you have the right hardener for it.
    • Fiberglass Cloth: This will help reinforce your boat and make it more durable. You'll use epoxy to coat the fiberglass cloth, creating a strong, waterproof layer.
    • Paint: You'll need paint for both the inside and outside of your boat. Choose a paint that's designed for marine use, and that will stand up to the elements.
    • Hardware for Seats and Accessories: You'll need some brackets, hinges, and other hardware for attaching seats, gun holders, and any other accessories you want to add to your boat.

    Tools

    • Table Saw: You'll need this for cutting the plywood and framing lumber to size.
    • Circular Saw: This will be helpful for cutting larger pieces of wood and for making cuts in tight spaces.
    • Jigsaw: This will help you create intricate shapes, especially for the sides of your boat.
    • Drill and Drill Bits: A good drill is a must for drilling holes for screws, bolts, and for making holes for your seats and accessories.
    • Measuring Tape: Accuracy is key, so make sure you have a trusty measuring tape.
    • Clamps: You'll need a variety of clamps to hold your boat together while you work.
    • Safety Glasses: Eye protection is essential when working with wood and power tools.
    • Dust Mask: Sawdust can be hazardous, so wear a dust mask to protect your lungs.

    Building the Boat

    Alright, now for the fun part: the actual construction. You're gonna need some patience and a clear mind for this, but don't worry, it's not as complicated as it looks.

    Building the Frame

    First, you need to build a strong frame to support the plywood hull. This frame is usually made from cedar or fir, and it consists of longitudinal stringers that run the length of the boat and ribs that run across the boat, connecting the stringers. It's a good idea to draw out a plan on paper or use a boat building software to make sure your measurements and angles are correct.

    Adding the Plywood Hull

    Once the frame is solid, you'll start attaching the plywood sheets to the frame. This is where you'll need your patience! You're basically creating the shape of your boat using the plywood, carefully cutting and fitting it to the frame, ensuring you have smooth curves and a watertight hull.

    Adding Ribs and Strengthening the Hull

    The next step is to add more ribs to the interior of the hull. These ribs further strengthen the boat and make it more rigid. You'll also want to add a keel, a central strip of wood that runs along the bottom of the boat for added stability. Use epoxy and fiberglass to create strong, watertight joints.

    Building the Deck

    Now it's time for the deck. This is the top part of your boat, where you'll be standing or sitting while hunting. The deck is usually made of plywood and it needs to be strong enough to support you and your gear. This is where you'll also add any features like seats, a gun rack, or storage compartments.

    Finishing Touches

    Once the main structure is complete, it's time for the final touches. Sand down any rough edges, and smooth out the surfaces to ensure a good paint finish. Add any additional features you want, like a bowsprit (the pointed piece of wood at the front of the boat), oarlocks for rowing, or even a small motor mount.

    Finishing the Boat

    Now, this is where the real fun begins! You're almost there, but you've got to make your boat ready for the water.

    Fiberglass and Epoxy

    First, you'll need to apply a layer of fiberglass cloth to the inside and outside of your boat. This will add even more strength and make the boat virtually watertight. Make sure you use a good quality epoxy resin to coat the fiberglass.

    Painting

    The next step is to paint your boat. Use a marine-grade paint that will stand up to the elements and resist chipping. You can paint it a camouflage color or a bright color, whatever suits your hunting style. Make sure you apply the paint evenly and let it dry completely.

    Testing

    Finally, you're ready to test your boat. Take it out to a calm lake or pond, make sure it floats, and there aren't any leaks. You can also use this opportunity to make any adjustments or modifications.

    Safety and Legal Considerations

    Now, remember, building a duck boat isn't just about carpentry. It's about safety and following the law. You need to make sure your boat is safe to operate, and you need to comply with any state and federal regulations regarding duck hunting.

    Here are a few things to consider:

    • Life Jackets: Always wear a life jacket when you're on the water.
    • Safety Gear: Carry a whistle, a flashlight, and a first-aid kit in case of an emergency.
    • Boat Registration: You may need to register your boat with your state.
    • Hunting Licenses: Make sure you have all the necessary licenses and permits to hunt ducks in your area.
    • Duck Hunting Regulations: Familiarize yourself with the regulations for duck hunting in your state. This includes bag limits, hunting seasons, and other restrictions.

    Tips for Success

    Here are a few tips to help you build a successful duck boat:

    • Start Small: If you're new to boat building, it's best to start with a smaller, simpler design.
    • Plan Ahead: Create a detailed plan before you start cutting wood. This will help you stay organized and avoid mistakes.
    • Use High-Quality Materials: Don't skimp on the materials. Use marine-grade plywood and wood that's resistant to rot and insects.
    • Take Your Time: Boat building takes time and patience. Don't rush the process.
    • Ask for Help: If you're not sure how to do something, ask for help from an experienced boat builder.

    Commonly Asked Questions

    How much does it cost to build a wooden duck boat?

    The cost of building a duck boat can vary greatly depending on the size and complexity of the boat, as well as the materials you use. You can expect to spend anywhere from a few hundred dollars to a few thousand dollars for a basic wooden duck boat.

    How long does it take to build a wooden duck boat?

    Again, this depends on the size and complexity of the boat, as well as your experience level. A basic wooden duck boat can be built in a few weeks, while a more elaborate design could take months.

    Do I need any special skills to build a wooden duck boat?

    While it's helpful to have some woodworking experience, it's not strictly necessary. If you're willing to learn and put in the time, you can build a wooden duck boat even if you're a beginner.

    What if I don't have all the tools?

    Don't worry! You can rent many of the tools you need, or find a local woodworking shop that can help you with some of the more complex tasks. You can also find many resources online, including videos and tutorials, that can guide you through the process.

    Remember, building a wooden duck boat is a rewarding challenge that will bring you hours of enjoyment, both during the building process and when you're out on the water hunting ducks.

    Read More..
    How to Build a Wooden Houseboat from Scratch: Detailed Plans

    How to Build a Wooden Houseboat from Scratch: Detailed Plans

    Hey there, fellow water enthusiast! So you're dreaming of building your own wooden houseboat. It's a project that's as ambitious as it is rewarding. You'll be floating your own custom-designed haven on the water, a place to escape the hustle and bustle of everyday life. I'm here to guide you through this journey, sharing practical advice and insights on building a wooden houseboat from scratch. Let's dive in!

    1. Planning Your Dream Houseboat

    The foundation of a successful houseboat build lies in meticulous planning. Here’s where you get to unleash your creativity and determine the perfect size, layout, and features of your floating abode.

    1.1. Defining Your Needs

    First things first: what will you use your houseboat for? Will it be a weekend getaway, a full-time residence, or a platform for fishing and exploring? Knowing how you'll use the boat will inform your design choices. For instance, a weekend getaway might need less living space compared to a full-time residence.

    1.2. Size and Dimensions

    Consider the size of your dream houseboat. A smaller boat is easier to build and manage, while a larger one offers more space and amenities. Factor in the weight of the materials and the size of the waterways you plan to navigate.

    1.3. Layout and Design

    Sketch out a preliminary layout, experimenting with different cabin configurations, deck space, and storage solutions. Think about the flow of traffic within the houseboat. Do you want a separate bedroom, a kitchen, a bathroom? This is your chance to create a space that reflects your personal style.

    1.4. Budget

    Establishing a budget early on is crucial. Wood, tools, and labor can add up quickly. Consider the cost of materials, permits, and potential professional help.

    2. Materials and Tools

    Building a wooden houseboat demands quality materials and the right tools for the job. You'll need a solid foundation, a sturdy hull, and suitable interior finishes.

    2.1. Hull Material

    Traditionally, houseboats were built with cedar, pine, or fir due to their durability and water resistance. However, you can also opt for treated plywood for the hull. Consider factors like cost, availability, and desired lifespan when choosing your material.

    2.2. Framing and Support

    The framing is what gives your houseboat its structural integrity. Use durable lumber like oak or Douglas fir for the frame.

    2.3. Interior Finishes

    Once the structure is complete, it's time to personalize your space. You can use various wood finishes, paint, or other decorative elements. Opt for materials that are resistant to moisture and humidity.

    2.4. Essential Tools

    You'll need a comprehensive set of tools, including:

  • Circular saw
  • Jig saw
  • Power drill
  • Sandpaper
  • Measuring tape
  • Level
  • Clamps
  • Safety gear
  • 3. Construction: Building the Houseboat

    Here's where the real magic happens. You'll be bringing your plans to life, shaping the structure of your dream houseboat.

    3.1. Building the Hull

    This is the foundation of your houseboat. Depending on the chosen material, you'll need to cut and assemble planks or plywood sheets.

    3.2. Framing

    After the hull, you'll create the interior structure. This involves framing the walls, floors, and ceiling using lumber or plywood.

    3.3. Deck Construction

    The deck is your outdoor living space, offering breathtaking views and a connection to the water. Choose a strong, durable material for the deck.

    3.4. Interior Finishes

    Now you can personalize the interior. Install flooring, cabinetry, countertops, and any other features you desire. Remember to choose water-resistant materials.

    4. Systems and Appliances

    A functional houseboat needs essential systems and appliances.

    4.1. Plumbing and Wastewater

    Install a plumbing system that includes sinks, a toilet, and showers. You'll need to research local regulations regarding wastewater disposal.

    4.2. Electrical System

    A safe and reliable electrical system is crucial. Install wiring, outlets, and lighting. Consider the use of solar panels to reduce your environmental impact.

    4.3. Heating and Cooling

    Choose a heating and cooling system that works effectively in a marine environment. Propane heaters, air conditioners, and fans are common choices.

    5. Launching and Finishing Touches

    You've built the houseboat, now it's time to get it ready for its watery home.

    5.1. Launching

    Carefully launch your houseboat into the water. Ensure the boat is properly balanced and secure.

    5.2. Finishing Touches

    Now is the time to add the finishing touches! Paint the exterior, install railings, add curtains, and personalize your space to make it truly your own.

    6. Navigating and Regulations

    Before venturing out, you need to be aware of navigation and regulations.

    6.1. Navigation

    Learn basic navigation techniques, understanding charts, compass readings, and boat handling.

    6.2. Regulations

    Research and comply with all local and federal regulations for houseboats. This includes registration, safety equipment, and environmental rules.

    Commonly Asked Questions

    Q: How much does it cost to build a wooden houseboat?

    The cost varies greatly based on size, materials, and complexity. You can expect to spend anywhere from $10,000 to $100,000 or more.

    Q: Do I need any special permits?

    Yes, you'll likely need permits from local authorities for construction, launching, and use of your houseboat.

    Q: How long does it take to build a houseboat?

    The construction time depends on your experience and the complexity of your design. It could take anywhere from several months to a year or more.

    Q: What are some safety considerations?

    Prioritize safety by wearing appropriate personal protective equipment during construction, installing safety features like railings and life jackets, and learning proper boat handling techniques.

    Building a wooden houseboat is a challenging yet rewarding project. By carefully planning, following best practices, and prioritizing safety, you can turn your dream of a floating home into a reality. Enjoy the process and welcome aboard!

    Read More..